How Much Protein You Need and

Pro Bodybuilders eat about one gram (sometimes even 1.5 grams) of protein per pound of body weight or per pound of non-fat tissue. I'm sure you've seen that the recommended dail

Comments

Friday, November 6, 2015

Best Bicep Workout Routine

Here are some things that should be remembered before getting to details:

  1. Some guys don’t have well grown bicep muscles. On the outside of the arm but have very well detailed bicep muscles on the inside of the arm. Have you?
  2. One reason for such a situation is that these biceps have been trained with a restricted range of exercises which didn’t let the bicep muscles grow.
  3. Other terms used are bicep width and peak. Here are some biceps work out below:

  • Barbell curls
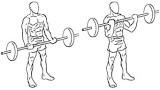
    Barbell curls

Using a shoulder-width grip, grasp a barbell with an underhand grip. Stand up straight with your feet about shoulder width apart. Curl the bar up toward your chest in an arc, keeping your elbows locked in the same place close to your sides. Bring the weight up as high as you can and squeeze the biceps at the peak of the movement for a one-count. Lower the weight slowly, and return to the start position and repeat.

  • Concentration curls
    Concentration curls

Sit on the end of a flat bench with your legs apart and lean forward slightly. Grab a dumbbell in one hand with your palm facing upward and rest your elbow on the inside of your thigh letting the dumbbell hang. Slowly curl the weight up while keeping your elbow locked in place against your thigh. As you are curling, twist your wrist to the outside. Squeeze the muscle at the top of the movement for a one-count and then slowly return to the start position and repeat.

  • Dumbbell bicep curl
    Dumbbell bicep curl

Stand up straight with a dumbbell in each hand at arm’s length. Keep your elbows close to your torso and rotate the palms of your hands until

they are facing forward. This will be your starting position.

Now, keeping the upper arms stationary, exhale and curl the weights while contracting your biceps. Continue to raise the weights until your

biceps are fully contracted and the dumbbells are at shoulder level. Hold the contracted position for a brief pause as you squeeze your

biceps.

Then, inhale and slowly begin to lower the dumbbells back to the starting position.

Repeat for the recommended amount of repetitions.

Close-grip standing barbell curl

Close-grip standing barbell curl

Hold barbell with both hands, palms up and about 6 to 8 inches apart. Stand straight up and keep your back locked in a firm position. Curl the bar up as if to touch your hands to your shoulders. Keep your elbows locked at your sides. Slowly return to the starting position and repeat.

Cross body hammer curl
Bicep Workout Routine

  1. Stand up straight with a dumbbell in each hand. Your hands should be down at your side with your palms facing in.
  2. While keeping your palms facing in and without twisting your arm, curl the dumbbell of the right arm up towards your left shoulder as you

exhale. Touch the top of the dumbbell to your shoulder and hold the contraction for a second.

    1. Slowly lower the dumbbell along the same path as you inhale and then repeat the same movement for the left arm.
    2. Continue alternating in this fashion until the recommended amount of repetitions is performed for each arm.

Incline dumbbell curl

Lie back on an incline bench and hold a dumbbell in each hand. Let your arms hang straight down on both sides with your palms facing in toward each other. Slowly curl the weight in your left hand as if to touch it to your left shoulder. While you are curling the dumbbell, slowly turn your wrist outward so that your thumb points away from your body. Squeeze your bicep at the top of the movement for a one-count and then slowly return to the start position and repeat with your right arm.

Friday Q&A: Cervical Radiculopathy

Clear Upward Lengthening of Cervical Spine in Mountain Pose
Q: I'm a 68 year-old female and have recently been diagnosed with cervical radiculopathy. While my yoga instructor is usually very helpful neither she nor the physical therapist I saw can tell me what poses to avoid and which ones can be helpful. My MD is a yoga practitioner and recommends hot yoga. I don't feel that is an option for me. My Dr. is not helpful enough. Pretty much "don't do it if it hurts". So I now am pretty sure what I shouldn't do. It's the poses that are beneficial I need help with. Any suggestions? 

A: As I reviewed the questions we have received over the years, I found that neck pain is near the top of the list. I have written about neck pain several times in past, and in my post Friday Q&A: Safe Neck Movements, I cover quite a few causes and kinds of neck pain, and make some general recommendations about safe neck stretching and mobilizing movements. 

However, today’s reader has a slightly different situation going on from what I have previously addressed, as she mentions a diagnosis of cervical radiculopathy. This condition is defined as irritation of nerve roots of the neck due to a herniation or prolapse of a intervertebral disk from its normal position, which impinge or press on nearby nerves resulting in pain and neurologic symptoms. This situation is potentially more serious than some other causes of neck pain and stiffness, as the nerves being pressed on could eventually lead to more permanent nerve damage, resulting in weakness and loss of normal function, especially in one arm. So, if our reader has only seen her family MD about this, my first recommendation is for her to consider seeing a neurologic specialist and getting a second opinion on her condition and cautions for her yoga practice. 

And although I am always pleased to hear of doctors who are yogis and who consider recommending yoga to their patients as a part of a well rounded therapeutic program for treatment and healing, I personally would not recommend hot yoga in this case, especially for an older adult who might react negatively to the extreme heat of the practice room and because—from my personal experience—the typical hot yoga sequence would not be appropriate someone with our reader’s condition (again, just my opinion hot yoga lovers!) 

Our reader’s physical therapist and local yoga teacher may have been perfectly justified in being reluctant to offer advice on what to do and what to avoid, due to the greater chance of cervical radiculopathy being a more serious source of neck pain. That said, poses to avoid may be obvious. First of all, avoid any poses where you are bearing weight on your neck and head, including Headstand (Sirsasana), Shoulderstand (Sarvangasana), Plow pose (Halasana), Rabbit pose (Sasangasana), Fish pose (Matsayasana), and so on. 

Since forward bending of the neck, with or without some rotation, often aggravates or encourages ruptured discs to press on nerves, avoid those movements, too. Examples of forward bending the neck are the chin lock (Jalandara Bandha) and letting your head release to the floor in Downward-Facing Dog pose (Adho Mukha Svanasana). And if you are not certain if the pressure of some unusual pose is safe for your neck, such as the all fours twist with your head on the floor, which is sometimes called Thread the Needle pose (Parsva Balasana) and which Melina Meza calls Reaching Under the Bed pose, then just don’t do it! 

As for poses or movements that are safe, one generally safe pose to work on is Mountain pose (Tadasana) with a clear upward lengthening of your cervical spine, especially if you have Head Forward Syndrome or Text Neck (see Friday Q&A: Text Neck and Head Forward Syndrome). By actively working this way on a regular basis, you can encourage a healthy, more natural alignment of you cervical bones and discs, which could potentially take some pressure off the impinged nerves that are causing pain, numbness, and tingling that sometime accompany this condition. In other words, work on good posture as often as you can! Other standing poses, such as Arms Overhead pose (Urdva Hastasana), Powerful pose (Utkatasana), Warrior 1 and 2 (Virabradrasana 1 and 2), could also be potentially beneficial, as long as you monitor your symptoms as you work on neutral neck alignment, slight rotation (as in Warrior 2) and slight extension (as in Powerful pose and Warrior 1). Also, you could cautiously try poses that strengthen the back muscles of your neck and those that take your neck into extension or mild back bending shape, such as a low version of Cobra pose (Bujangasana) or Locust pose (Salabasana) practiced dynamically. 

In summary:
  1. Get more information about your condition from an expert. 
  2. Avoid obvious poses that aggravate of your symptoms. 
  3. Mindfully try some of the poses where your neck is aligned more neutrally. 
  4. Let your body’s response to the poses guide you to finding poses that support good posture and help you maintain some flexibility and strength in your neck, without creating pain. 
I hope you find this helpful!

—Baxter

DISCLAIMER: This article is not meant to diagnose, treat or act as medical advice. Please consult your health care provider for clearance and guidance before following or participating in these activities.

Subscribe to Yoga for Healthy Aging by Email ° Follow Yoga for Healthy Aging on Facebook ° Join this site with Google Friend Connect

Thursday, November 5, 2015

Self Regulation and Yoga: Managing Your Internal States

by Nina
You Are Conscious Matter by Marie Lossky
About a year ago, I wrote a post about self regulation (see Self-Regulation, Psychological Health, and Yoga) because I was excited to learn about a study Potential self-regulatory mechanisms of yoga for psychological health by Gard, et al in the journal Frontiers in Human Neuroscience that provided a model for understanding how yoga can achieve the benefits of improved psychological health. I also said that the real takeaway for me from this article was that these scientists included all eight branches of yoga (see Ashtanga Yoga: Following the Eight-Fold Path) in their model as the tools that yoga provides to facilitate self regulation. 

But lately as I’ve been noticed that “self regulation” was becoming quite the trendy concept, I’ve been wondering, what exactly IS self regulation? I mean, I had a working definition when I wrote that post but because I hadn’t researched the subject that thoroughly, I wondered how accurate my understanding was. I soon discovered that some other people had the same question. Haha, unlike me who just typed the term into my handy search engine, those people—three York University researchers—actually conducted a study! They, too, observed that there was a lot of confusion around the term, and they were looking for clarity. (Weird, I know, but it turns out people conduct studies to determine what a term means.) Without going into how they came up with this conclusion (see for yourself at Researchers map 'self-regulation' to develop comprehensive definition), I must say I quite liked their “comprehensive” definition. 

Learning 'self-regulation' involves learning how to monitor and manage your internal states, understanding what it feels like to be calm and alert, and so also learning to recognize when certain activities help you to return yourself to those states most easily, as well as what pulls you out of them.

The term “self regulation” is often used regarding children (I think you can imagine what a child who is not able to self regulate at all might be like) but of course it can apply to all of us, because who among us is not sometimes swamped with emotions that cause us to do things we might later regret

And now that I have a better understanding of what the term means, I thought I’d look at bit more closely which yoga techniques can help improve self regulation. (I read or hear so often that “yoga” can help with this or that problem, but yoga is such a large collection of techniques and practices that I feel that it is important to be more specific than just saying "yoga.") So I’ve broken down the definition the following five different phases:

1. Monitoring Your Internal States. Whether you are meditating or practicing asana mindfully, using your witness mind as I described in The Power of Svadhyaya (Self Study), Part 1 allows you to observe your emotional responses and thought patterns, helping you uncover habitual responses to stressors. This is the first step toward improving self regulation.

2. Understanding What It Feels Like to Be Calm and Alert. Yoga practices that trigger the Relaxation Response, including meditation, breath awareness, and restorative yoga, allow you to experience conscious relaxation in the safety of the yoga room (see The Relaxation Response and Yoga). In this state, your mind opens to a wider range of possible reactions to stressors (see Stress and Your Thought-Behavior Repertoire). Having this experience in the yoga room teaches you that you can learn to respond to stressors in the real world in a similar way. 

3. Recognizing When Certain Activities Help you Return to Those States Most Easily. Experimenting with a wide range of yoga practices, including different yoga poses, different meditation techniques, different breath techniques, and even studying yoga philosophy helps you recognize which yoga “activities” work best to help you return to a more balanced state. (I know, for example, that Baxter loves a yoga nidra practice, while I myself prefer Legs Up the Wall pose and revisiting some of my favorite passages from the yoga scriptures.)

4. Recognizing What Pulls You Out of Those States. Working with your witness mind in the yoga room trains you to start observing yourself in more volatile situations in your everyday life. You can learn which external or internal events set you off or make you more likely to be off balance. Some of these may be things you can change, for example, by eating more regularly, finding a less stressful way to get to work, or getting more sleep. For those stressors that you cannot avoid, you can learn to respond differently to them (see Re-Patterning Your Nervous System: Practice for the Real World).

5. Managing Your Internal States. Besides relaxation practices, you can use yoga asanas and breath practices to energize yourself when you are feeling fatigued and to uplift yourself when you’re feeling depressed. Using yoga to manage your internal states allows to make yourself feel better through your own efforts rather than relying on outside events or other people to calm you down or cheer you up, and gives you feeling of control over your emotional life.

Although “self regulation” is new concept to me, because I’ve been practicing yoga for over 20 years and using it to reduce my stress levels, to restore myself when I’m depleted, to energize myself when I’m fatigued, and to uplift myself when I’m feeling a bit depressed, it turns out I’ve been self regulating all this time without even knowing it. And that’s one of the main reasons yoga is so important to me. How about you?

Subscribe to Yoga for Healthy Aging by Email ° Follow Yoga for Healthy Aging on Facebook ° Join this site with Google Friend Connect

Wednesday, November 4, 2015

New Dates for Yoga for Healthy Aging Intensive!

by Nina
Our earlier post about our next Yoga for Healthy Aging intensive in July, 2016 turned out to be premature. Due to circumstances beyond our control, the dates have been changed. This 30-hour intensive will be held at Namaste Yoga in Berkeley, California, from July 11 to July 15, with an extra day on July 16 for yoga teachers who want YFHA certification. Baxter and I will conduct the training.

This course will provide instructions on maintaining your physical, mental, and emotional health as you age. The main focus of the course is on preventative strategies, covering:
  • Strength
  • Flexibility
  • Agility
  • Balance
  • Stress Management
  • Circulatory System/Heart Health
  • Brain Health
  • Medical Conditions (in general)
  • Equanimity 
We’ll present the scientific background that explains how and why yoga works to foster healthy aging, so you’ll understand which techniques to use when. And we’ll teach yoga the essential yoga poses, yoga sequences, and other practices that will set you up for a lifetime of practice.

This intensive is designed for relatively healthy, relatively physically able participants. It will not include instructions for or information about yoga for seniors who cannot stand unaided and need to practice in chairs. It also will not include information about using yoga as therapy for specific, individual medical conditions, although there will be a bit of general background on that subject.

For certified yoga teachers, this course will provide supplemental, specialized training in yoga for healthy aging techniques, which you can then teach to your own students. For yoga students with one or more years of experience, this course will provide you with the tools to create a personalized yoga program that meets your particular needs and concerns.

For teachers who want YHFA Certification, you will need to:
  1. Attend an extra session, where you'll do a short teaching demonstration.
  2. Pass the take-home final that we provide.
Sign ups for the intensive will be through Namaste Yoga, and I’ll let you know as soon as this is set up (along with pricing). But for now, if you’re considering attending, just save the date! (This year's intensive sold out very quickly.)

Subscribe to Yoga for Healthy Aging by Email ° Follow Yoga for Healthy Aging on Facebook ° Join this site with Google Friend Connect

Tuesday, November 3, 2015

Featured Pose: Upward-Facing Dog Pose (Urdva Mukha Svanasana)

by Baxter
Last week we looked at Cobra pose, a beginning-level backbend. Today, let’s turn our attention to Upward-Facing Dog pose (Urdva Mukha Svanasana), a more intermediate-level backbend that is the next logical progression from Cobra pose. As in Cobra pose, in Upward-Facing Dog pose, you will be lifting your chest up away from gravity into a backbend shape, but this pose is more strengthening for your arms and shoulders because you are bearing more body weight with them and more strengthening for your legs because they are lifting off the ground. In addition, compared with Cobra, this pose stretches more of your front body muscles—and stretches them more intensely—and strengthens your back spinal muscles more. It also creates more stretch at the fronts of your hip joints and ankle joints in some variations. All in all, it is a wonderful pose for increasing the strength in your leg and chest muscles, such as the quadriceps (quads) and hamstrings in your legs and your pectorals (pecs) and lattisimus dorsi (lats) in your chest.

I prescribe this pose for:
  • Building upper body strength
  • Building lower body strength
  • Stretching the front body, especially the front hip joints, abdomen and front legs
  • Strengthening the back spinal muscles
  • Improving posture 
  • Energizing pose for fatigue
  • Uplifting pose for depression 
Cautions: With deeper backbends such as this one, some people with lower, middle or upper back pain may find this pose triggers pain. In this case, you may need to stick with Cobra and Locust poses. People with wrist and hand issues such as Carpel Tunnel Syndrome and arthritis of the thumbs may need to modify or skip this pose if it increases your pain.

Classic Version
To come into the pose, start by coming into Downward-Facing Dog pose. Then swing your shoulders forward over your wrists into Plank pose.
At this point your toes are still turned under, so take a moment to individually lift and point your toes backwards and rest the tops of your feet and toes on your mat, pressing the tops of your feet down firmly into the mat to assist in keeping your knees off the floor. As you do this, pivoting at your shoulders, swing your hips forward towards your wrists. Make sure to keep your shoulders directly over your wrists to avoid hyperextending your wrist joints. 

To work in the pose, press your entire palms firmly down into the floor. Firm your arms and press upwards towards your shoulders while also firming the muscles of your legs to keep your legs hovering just a few inches off the floor. Widen your collarbones away from your breast bone and draw your shoulder blades down your back as you keep your chest lifted. Either look straight ahead or, if you have a healthy cervical spine, arch your neck and lift your chin and head to look upwards.

Start by holding the pose for 6-8 breaths and gradually work your way up to longer holds, up to 1 minute. To come out of the pose, one foot at a time, turn your toes under. Then on an inhalation swing your hips up and back into Downward-Facing Dog, engaging your abdominal muscles towards your spine to assist in the transition. 

Toes Turned Under
This variation of Upward-Facing Dog pose is a good one to use when you are practicing Sun Salutations. Because you are only in Upward-Facing Dog for a breath or two, it is more efficient to make the transitions to and from Downward-Facing Dog without dealing with the foot change in the classic version. Also, with your toes turned under, your legs work differently, creating more isometric action in your calves, which can both stretch and strengthen that area. 

Enter the pose the same way as the classic version, skipping the part where you come onto the tops of your feet. Instead, as you bring your body into the backbend, imagine you are pressing your heels into a wall behind you. This will engage your entire leg musculature more actively to assist your arms in keeping you into the pose. If you feel a pain or pinching in your lower back in this version, try firming your abdomen back toward your spine. 

You can stay in the pose for a breath or two, as in a Sun Salutation, or longer as in the classic version. To come out of the pose, exit on an exhalation as in the classic pose. 

Hands on Blocks
Having your hands on blocks elevates you a few inches higher than the classic pose, so is great if you are having trouble getting your knees off the floor. It also allows for a bigger backbend curve in your spine if you’d like to work on spinal flexibility. 

Although you could come into this version from Downward Dog with your hands on blocks, I recommend coming into the pose from a prone position, lying on your belly. Start by coming onto your belly as you would for Cobra pose, with two blocks on their lowest height, positioned lengthwise next to your middle to lower ribs (the first few times you do the pose, you may have to move the blocks a bit forward and back to fight the right position for them so that when you are up in pose, your shoulders are over the wrists without hyperextension). 

Now, bend your arms like grasshopper legs and place your palms on the blocks. Begin to roll your chest and head up, pressing your hands more firmly to allow your arms to assist you in gradually curling up towards straight arms. As you roll up, press down with the tops of your feet and lift your legs off the floor, keeping your knees straight. Once your arms are straight, work in the pose the same way as for the classic version.

Stay for 6-8 breaths initially, and gradually work up to longer holds, up to 1 minute. To exit the pose, slowly bend your arms and lower yourself back down onto your belly, chest, and chin. 

Chair Version

(sorry, no photo)

Because this version does not require as much strength or spinal flexibility as the classic version, it is a good intermediate pose in going from Cobra towards learning full Upward Dog. For this version, I’m suggesting that keep your toes turned under, as rolling onto the tops of your feet in this position is a much more intense stretch than in the classic version, but if having the tops of your feet on the floor is comfortable, you can practice that way if you wish.

Start by placing a chair against a wall on your sticky mat. Then stand facing the chair, about a foot away. Bend your knees a bit, and bend forward, placing your hands flat on the chair seat with your wrists near the front edge of the chair. Then, walk your feet away from the chair about 3-4 feet, coming into Downward-Facing Dog on the chair. 

Then, on an inhalation, swing your shoulders forward over your wrists into chair Plank pose.
Next, swing your hips forward towards the chair to come into the backbend while simultaneously pressing back into your heels to firm your legs. To work in the pose, use the same actions as the classic version. 

Stay in the pose for 6-8 breaths and gradually work up to longer holds, up to 1 minute. To come out of the pose, on an exhalation, swing back into Downward-Facing Dog with the chair. Then walk forward toward the chair and come up into Mountain pose (Tadasana). 

Subscribe to Yoga for Healthy Aging by Email ° Follow Yoga for Healthy Aging on Facebook ° Join this site with Google Friend Connect

Creatine - Supplement NOT Steroid - How To Use Creatine to Build Muscle Mass

Creatine is a nutritional supplement that bodybuilders and athletes take. It is not a hormone or a steroid.  Creatine is one of the most-researched sports supplements out there so there really is no mystery involved anymore.  It is an organic amino acid that is naturally produced  in all humans and animals.   About half of the creatine in your body comes from you, the other half comes from food, usually meat or fish, that you eat.   This magical substance helps to supply energy to all cells in the body especially those that require high amount of energy, primarily muscle.  Bodybuilders and athletes that rely on strength such as Football players and Rugby players use creatine supplements to gain help gain muscle mass more effectively.  It is perfectly legal  and supplementation is not currently banned by any athletic organization.  Since creatine is naturally found in your body there really is no need to ban it.
Creatine - Supplement NOT Steroid

What is creatine?

Creatine is a naturally occurring amino acid.  It plays a major role in cellular energy and helps regenerate ATP (Adenosine Triphosphate) in the human body. Without ATP, muscle contraction is not possible. Creatine is said to increase energy, power output, and enhances muscle size and strength. Research shows that creatine is most effective in high-intensity training and explosive activities. This includes weight training and sports that require short bursts of effort, such as sprinting, football, and baseball.  Creatine is NOT recommended for people who want to lose weight because the main result and purpose of creatine use is to gain weight.  It won't help you run faster, or swim longer, or burn calories. 

How does creatine work?
Creatine - Supplement NOT Steroid
Creatine pulls water into your muscle cells, which increases protein synthesis, but this only happens if you take advantage of the boost in energy and hit the gym. Otherwise, it is just water weight.  If you do hit the gym hard after supplementing, you will get bigger because your muscle fibers will increase.  You will be able to do more reps and that will be the cause of your gains. Also, interestingly enough, according to the Wikipedia entry, creatine has been proven to increase intelligence.  Can't go wrong there!

The most simple and pure creatine supplement is the best.  If it dissolves completely in liquid then it is probably good.  Some cheaper brands don't dissolve well and leave you with half of the stuff glued to the bottom of the glass.  So you end up wasting your money.  Its best to invest in a highly rated and reviewed brand so you can get more for your money.  In my opinion the best (and only creatine I use) is creatine monohydrate.  Its always best to buy in bulk making your purchase inexpensive in the long run. Various studies have shown that pure powdered creatine monohydrate is absorbed much faster then any liquid forms.

Why should I take creatine  with juice?
You should always take creatine dissolved in a high carbohydrate drink such as fruit juice.  The sugar in the juice raises insulin levels, which helps increase creatine uptake into the muscle.  Remember that you are still supposed to be eating a healthy and complete diet rich in lean proteins, carbohydrates and healthy fats.  You can take all the creatine in the world and see no results if you are not eating a proper diet, especially enough protein.  A commonly claimed side effect of creatine is dehydration.  This has not been proven but I would assume the people who claim to be dehydrated just need to drink more water to make up for the increase in water being used by the body by a sudden increase in muscle mass.  Other than that there really are no proven side effects of creatine supplementation, which is why you can see it all over the shelves at GNC and other supplement shops.  It works if used properly

Is creatine safe for teenagers?

This information is intended for adults over the age of 18.  If you are a child or teenager you must always consult your parents and physician before making any changes to your diet and exercise routine.  It is also recommended that people with kidney problems stay away from creatine because it is processed in the kidneys and it is always better be on the side of caution. 

Where can I buy creatine?

I like to buy my creatine from online sources such as Amazon.com.  They really have good deals and it gets delivered right to my door.  Its also a great place to read reviews from other members.  I rely heavily on reviews.  Look for products that have a large number of reviews rather than just a few.  If a heavily reviewed product has only a few stars just forget it.  You can also find it at Walmart, Target, K-mart, GNC, Sears, and  Vitamin World.

Monday, November 2, 2015

Video of the Week: Pirate Pose 3.0

Have you ever tried doing your yoga balance poses at the beach? Not easy, right! With that in mind, this video provides instructions for practicing Pirate Pose 2.0 with a bit more challenge by having you stand on a yoga sandbag. And you can walk the plank by going even further by placing a block on the sandbag and trying it again. (If you don't have a sandbag, try a large bag of rice.)
Subscribe to Yoga for Healthy Aging by Email ° Follow Yoga for Healthy Aging on Facebook ° Join this site with Google Friend Connect